

You’re just a few steps away from creating the entertainment space you’ve always wanted. Learning how to build a bar free plans is surprisingly straightforward. It really just boils down to finding a design you love, gathering your materials, putting the frame together, and adding your own unique finishing touches to make it yours.
Your Quick Guide to Building a Home Bar
Building a custom home bar is so much more than a woodworking project—it’s about crafting a personalized hub for entertaining, relaxing, and making memories. The finished product also makes for an incredible, high-value gift for a loved one or a standout centerpiece for a corporate event.
Maybe you’re dreaming of a rustic corner for whiskey tastings, or perhaps a sleek, modern setup for mixing cocktails. Whatever your vision, the journey starts with a solid plan. If you’re new to DIY, the idea might feel a little intimidating, but there are countless free plans online that break the whole process down into easy, manageable stages. This guide will walk you through each phase, so you feel confident from the first cut to the final polish.
This project is also a fantastic opportunity for corporate buyers and event planners. Imagine building a custom bar for a company event or as a high-end client appreciation gift. It becomes a memorable centerpiece that showcases your brand's creativity and attention to detail, especially when paired with elegant, branded barware.
Core Stages of Your Bar Build
To give you a clear roadmap, let's break down the essential steps. Think of each stage as its own mini-project. When you see the whole picture, it makes the process feel much less overwhelming.
- Planning and Design: This is where you match your vision to your space. You'll measure your area, decide on the bar's style and features, and hunt down free plans that fit your skill level.
- Material Sourcing: With a plan in hand, you'll make a shopping list for lumber, hardware, and finishes. This is the perfect time to explore budget-friendly options like reclaimed wood for extra character.
- Construction and Assembly: Time to make some sawdust. You'll cut your pieces, build the frame, and put the main structure together. A little extra precision here goes a long way toward a sturdy, professional-looking result.
- Finishing and Styling: Here's where the magic happens. You’ll be sanding, staining, and sealing the wood. After that, it's all about adding your personal touches and stocking it with beautiful barware—which, by the way, make perfect gifting options to celebrate the new bar.
A well-built home bar isn't just furniture; it's a destination. It's the place where stories are shared and connections are made, turning an ordinary corner of your home into an extraordinary experience for friends, family, or valued clients.
If you want to brush up on your furniture-building skills, the principles in guides on how to build wardrobes from scratch offer some great insights that translate directly to a bar project.
And once your masterpiece is built, you'll want to stock it. Consider elevating the experience right from the start with our collection of premium barware, from elegant whiskey glasses to complete cocktail sets. They're the perfect finishing touch or a thoughtful gift to celebrate the finished build.
Choosing the Right Bar Design and Plan
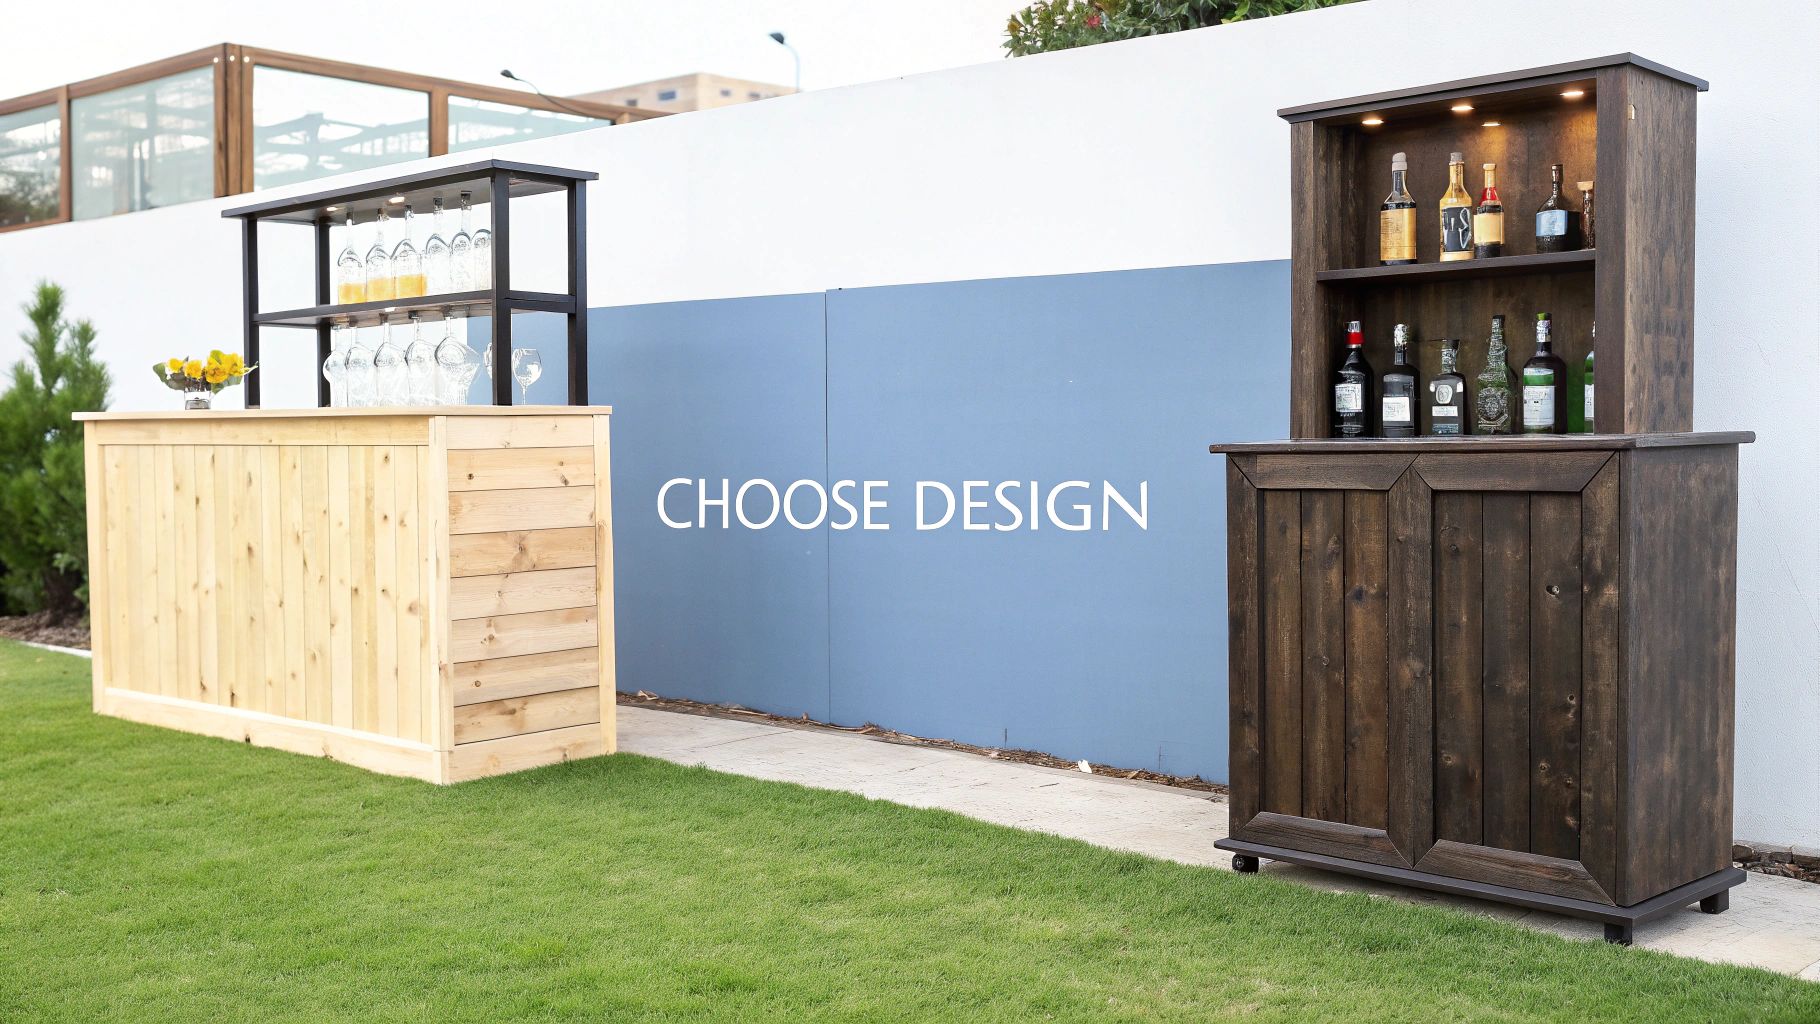
Before you even think about cutting a single piece of wood, the first real step is finding a design that feels right for your home and lifestyle. This isn't just about picking something that looks cool online; it's about creating a piece that fits seamlessly into your space and how you plan to use it.
So, what’s this bar really for? Is it your quiet corner for a nightcap, or the central command for big get-togethers? Maybe it’s a sophisticated spot to show off a prized collection of spirits and gift sets you've received. Knowing the answer will immediately narrow down your options and point you toward the right style and size.
For those of us thinking about corporate settings or event planning, the design takes on an even bigger role. A bar can be a powerful focal point for showcasing products or creating a branded experience. A well-planned design provides the perfect stage to display premium corporate gifts—think custom-engraved whiskey decanters or branded cocktail toolsets from our collection—turning the bar itself into a memorable part of the presentation.
Assessing Your Space and Skill Level
It's easy to get carried away by a grand, elaborate design, but you have to start with a reality check. Grab a tape measure and get the real dimensions of your designated area—length, width, and height. And don't forget to measure for "living space." You need room for people to pull out bar stools, open cabinets, and move around comfortably without feeling cramped.
Here are a few common setups I've seen work well:
- Tight Corners & Apartments: A compact, L-shaped corner bar is a classic for a reason. It tucks away neatly and makes great use of otherwise dead space.
- Open-Plan Living Areas: A freestanding bar cart or a clean, straight galley-style bar can double as a subtle room divider, defining the space without closing it off.
- Dedicated Game Rooms & Basements: If you've got the room, go for it. A larger, built-in wet bar with all the bells and whistles offers maximum function and storage.
Now, be honest with yourself about your DIY skills. If you're just starting out, stick to free plans with simple joinery, straight cuts, and crystal-clear instructions. For the seasoned woodworkers out there, feel free to tackle something more ambitious, like a curved countertop or intricate trim work.
Comparing Popular Bar Styles
The look and feel of your bar should echo the rest of your home's decor. A rustic farmhouse bar will just look odd in an ultra-modern loft. You want harmony, not a clash of styles.
This trend toward custom home features is part of something much bigger. The global construction market is projected to hit $17.04 trillion by 2025, a number that reflects a huge demand for detailed, personalized projects just like this. If you want to dive deeper, you can find more construction industry insights to see where the market is heading.
Choosing the right free plan is all about balancing your ambition with your reality. The best plan isn't the most complicated one—it's the one you can finish, feel proud of, and enjoy for years.
When you're browsing plans, look for ones that come with detailed diagrams, a full materials list, and clear, step-by-step instructions. A great set of plans feels like having an expert looking over your shoulder.
Home Bar Style Comparison for Your Space
To help you visualize what might work best, I've put together a quick comparison of popular styles. Think about your space, your budget, and how you might even pair a finished bar with the perfect gift for a housewarming or corporate event. Our product assortment is a fantastic match for any of these styles.
| Style | Space Needed | Cost Range | Best Gift Pairing |
|---|---|---|---|
| Modern Built-In | Medium to Large | $800 - $3,000+ | A complete decanter set with personalized whiskey glasses. |
| Rustic Freestanding | Small to Medium | $400 - $1,200 | Our handcrafted whiskey chilling stones and cigar accessories. |
| Compact Corner Bar | Small | $250 - $700 | A curated cocktail shaker set with essential bar tools. |
| Industrial Pipe & Wood | Small to Medium | $300 - $900 | A set of high-quality, branded glassware sets to match the edgy aesthetic. |
Ultimately, the right design does more than just hold bottles. It creates a destination in your home—a place to mix drinks, share stories, and show off your handiwork. By taking the time to think through your space, skills, and purpose, you'll be able to pick a plan that sets you up for a fantastic and rewarding build.
Smart Budgeting and Sourcing Your Materials
A great free plan is your blueprint for success, but the materials you choose are what will actually bring your home bar to life. The term "free plans" can be a little deceiving. While the design itself doesn't cost a dime, the lumber, hardware, and finishes certainly do.
This is where smart budgeting and clever sourcing become your most valuable tools, turning your project from a cool idea into an affordable reality.
Crafting a Realistic Project Budget
Before you buy a single 2x4, you need to map out your costs. A solid budget prevents that dreaded "scope creep" and makes sure you can finish the project without breaking the bank. Think of it as your financial roadmap.
Start by breaking down the major spending categories. Your primary expenses will almost always fall into these buckets:
- Lumber and Core Materials: This is your plywood, your dimensional lumber (like 2x4s), and any specialty woods you might want for the countertop or trim.
- Hardware and Fasteners: We're talking screws, nails, brackets, and any drawer slides or cabinet hinges your design calls for. Don't forget the fun stuff like handles or knobs.
- Finishes: This covers everything from sandpaper and wood stain to polyurethane, paint, and primer.
- Fixtures and Accessories: This is where you can add some personality—think foot rails, drip trays, or any built-in lighting. Our bar accessories are excellent additions here, serving as both functional tools and great gift ideas.
Once you have your list, it's time to do some window shopping and price research. A simple spreadsheet is perfect for tracking your estimated costs versus what you actually spend. This little step is a lifesaver for seeing where your money is going and finding spots where you might be able to save a few bucks.
A well-planned budget does more than just control spending. It empowers you to make informed decisions, letting you splurge on the elements that matter most to you, whether that's a stunning live-edge countertop or high-quality finishing touches.
For our corporate event planners out there, this process can be a game-changer. Imagine building a custom bar for a trade show or a client lounge. You can pair that impressive DIY structure with a curated selection of our premium barware, like personalized whiskey glasses or a complete decanter set. It’s a thoughtful, high-value package that leaves a lasting impression and makes for a perfect corporate gift.
Insider Strategies for Sourcing Affordable Materials
Now for the fun part: the treasure hunt for great materials that don’t cost a fortune. High prices and supply chain headaches are a real challenge right now, but with a bit of creativity, you can find quality stuff for a fraction of the retail price.
The current market definitely reflects this struggle; in fact, more than 75% of contractors report dealing with supply chain disruptions. This makes using an adaptable set of free plans a fantastic way to stay flexible.
This is where your resourcefulness really shines. You’ve got to think beyond the big-box hardware stores.
Where to Look for Budget-Friendly Finds:
- Reclaimed Wood Dealers: Search for local sellers of reclaimed lumber from old barns, warehouses, or homes. This wood not only saves money but also comes with incredible character and a story you just can't buy new.
- Architectural Salvage Yards: These places are goldmines for unique hardware, corbels, and decorative bits and pieces that can give your bar a custom, high-end look on a shoestring budget.
- Online Marketplaces: Sites like Facebook Marketplace and Craigslist are fantastic for finding leftover materials from other people's projects, often at a steep discount.
- Lumberyard "Cull" Piles: Don't be shy—ask your local lumberyard if they have a discount pile for wood with minor imperfections like knots or a slight warp. You can often work around these small flaws and save a ton.
Don't Overlook the Finishing Touches
While the core structure is obviously important, it’s the finishing touches that elevate your bar from a simple piece of furniture to a true statement piece. This is everything from the stain you choose to the hardware you install and, of course, the accessories you stock it with.
Budgeting for these items from the get-go is key. Stylish cabinet pulls, a brass foot rail, or some under-cabinet LED lighting can make a massive impact. In the same way, the barware you choose sets the tone for the entire experience. Equipping your new bar with a set of elegant whiskey glasses or a professional-grade cocktail shaker just shows you care about the details. Our product assortment offers fantastic options for this, which also double as perfect gift ideas for any occasion.
For anyone looking to create a complete and polished setup, our guide on 8 essential home bar accessories is a great place to start. It’ll make sure you have everything you need to hit the ground running.
Bringing Your Bar to Life: Frame and Core Assembly
This is where it gets real. Your carefully selected plans and that neat stack of lumber are about to become something you can actually recognize—the skeleton of your home bar. For me, this is always the most exciting part of any build. You get to see your vision start to take shape right before your eyes.
But this is also where you need to slow down and focus. The frame is everything. A tiny mistake here, like a cut that’s just a hair off or a joint that isn’t quite snug, will come back to haunt you later. Think wobbly tops, uneven shelves, or trim that just won't line up. So, grab a coffee, put on some music, and let's build this thing right.
For those of you tackling this as a group—say, a corporate team-building day—the assembly phase is prime time for collaboration. To elevate the experience, our curated toolkits and bar accessory sets make fantastic corporate gifts. It's a small touch, but having quality, matching tools and accessories makes the whole process smoother and adds a professional feel to the day's work.
Precision Cuts for a Rock-Solid Foundation
You’ve heard it a million times: "measure twice, cut once." Well, it’s a cliché for a reason. Before that saw whirs to life, lay out your lumber and mark every single cut from your plans. A sharp pencil and a good combination square are non-negotiable for getting those lines perfectly straight.
Even a seemingly tiny error, just 1/8 of an inch, can cascade into bigger problems down the line. The right tools make all the difference in avoiding this.
- For Framing Lumber: A miter saw is your best friend for getting dead-on square cuts on your 2x4s. If you’re working with a circular saw, don't just eyeball it. Clamp a straightedge or speed square to your board to guide the saw.
- For Plywood & Panels: Wrangling big sheets of plywood can be awkward. Get it properly supported on sawhorses and use a circular saw with a fine-toothed blade to keep splintering to a minimum.
As you cut each piece, do yourself a huge favor and label it with the part number from your plans. This simple step takes seconds but will save you from a world of confusion when it’s time to put the puzzle together.
Building the Frame, One Piece at a Time
With a neatly labeled stack of perfectly cut pieces, you’re ready to start assembly. Most plans have you build the front and side frames as separate sections first. You’ll essentially be building a couple of big rectangles that you'll later connect to form the final shape.
Find a flat, level surface to work on. Your garage floor might look flat, but it probably isn't. Assembling the frame on an uneven surface is a surefire way to build a permanent twist into it. If you have to, use shims to get everything perfectly level before you start driving screws.
A bar frame is only as good as its joints. Don't be shy with the wood glue and use decent screws. A proper glue-and-screw joint is incredibly strong—often even stronger than the wood itself—and it’s the secret to building a bar that will last for decades.
Always drill pilot holes, especially when you’re screwing near the end of a board. It’s the best way to prevent the wood from splitting. A quick pass with a countersink bit will also let the screw heads sit nice and flush, which makes finishing and cladding much easier later on.
Side-Stepping Common Assembly Mistakes
Building a basic frame is pretty straightforward, but a few classic blunders can trip up anyone. Knowing what to watch for is half the battle.
The most common issue? A frame that isn't square. After you’ve screwed a section together, grab your tape measure and check the diagonals. Measure from one corner to the opposite corner, then do the same for the other two corners. If those two numbers match, you're perfectly square. If not, give the longer corner a gentle nudge until they do, then finish tightening your screws.
Wobbliness is another frequent culprit. This usually boils down to loose joints or skipping the internal bracing shown in the plans. Those diagonal braces and supports might seem optional, but they’re absolutely critical for the bar’s rigidity and long-term stability.
Finding a good set of plans that includes these essential details is key. To get you started, here's a look at some of the best places to find reliable plans online.
Top Sources for Reliable Free Bar Plans
This table breaks down some of our favorite spots to find free, high-quality bar plans. Whether you're a complete beginner or a seasoned woodworker, there's something out there for you.
| Source | Skill Level | Plan Format | Cost |
|---|---|---|---|
| Ana White | Beginner to Intermediate | Detailed blog posts with diagrams | Free |
| Instructables | Varies (User-submitted) | Step-by-step photos and text | Free |
| Popular Mechanics | Intermediate to Advanced | Classic blueprints and articles | Free |
| Woodworkers Guild of America | Beginner to Advanced | Video tutorials and PDF downloads | Free |
Each of these sites offers a different style and complexity, so take some time to browse and find a project that matches both your ambition and your current skillset.
Installing Shelving and Prepping for the Top
With your frame fully assembled, square, and solid, it's time to add the guts. The internal shelves do more than just hold bottles; they add a huge amount of structural support to the entire bar. These shelves are also the perfect place to display beautiful glassware and bar tool gift sets.
Start by installing the shelf supports, making sure they are perfectly level. Use a spirit level—don't trust your eyes on this one. Once the supports are screwed securely into the frame's studs, you can lay your shelves on top and fasten them down.
The final step in this phase is prepping for the countertop. Most plans call for a plywood sub-top that gets screwed directly onto the frame. This creates a solid, flat foundation for whatever beautiful countertop material you've chosen. Be generous with the screws here to make sure there's absolutely no flex or squeaking.
And just like that, you have a solid, functional bar. This is a massive milestone. The heavy lifting is done, and now you’re ready for the fun part: the finishing touches that will really make it your own.
Adding Finishes and Personal Style
The heavy lifting is over. All those precise cuts and careful assembly have paid off, and you’ve got a solid structure. But this next part? This is where the magic happens.
This is the phase where a simple wooden frame transforms into a jaw-dropping, personalized home bar. The finishing touches—sanding, staining, and sealing—are what will protect all your hard work and give your project that professional, polished look you’re after. It's also where you get to inject your own personality and style into the build, creating an atmosphere that feels uniquely you.
For our corporate clients, this stage is absolutely critical for brand alignment. The finishes and styling are your chance to create a bespoke piece that feels exclusive and high-end—perfect for a client lounge or as a seriously memorable corporate gift. A beautifully finished bar provides the perfect stage for showcasing premium products, like our engraved glassware or custom cocktail shakers.
This visual guide breaks down the foundational steps that get you here—measuring, cutting, and assembling.
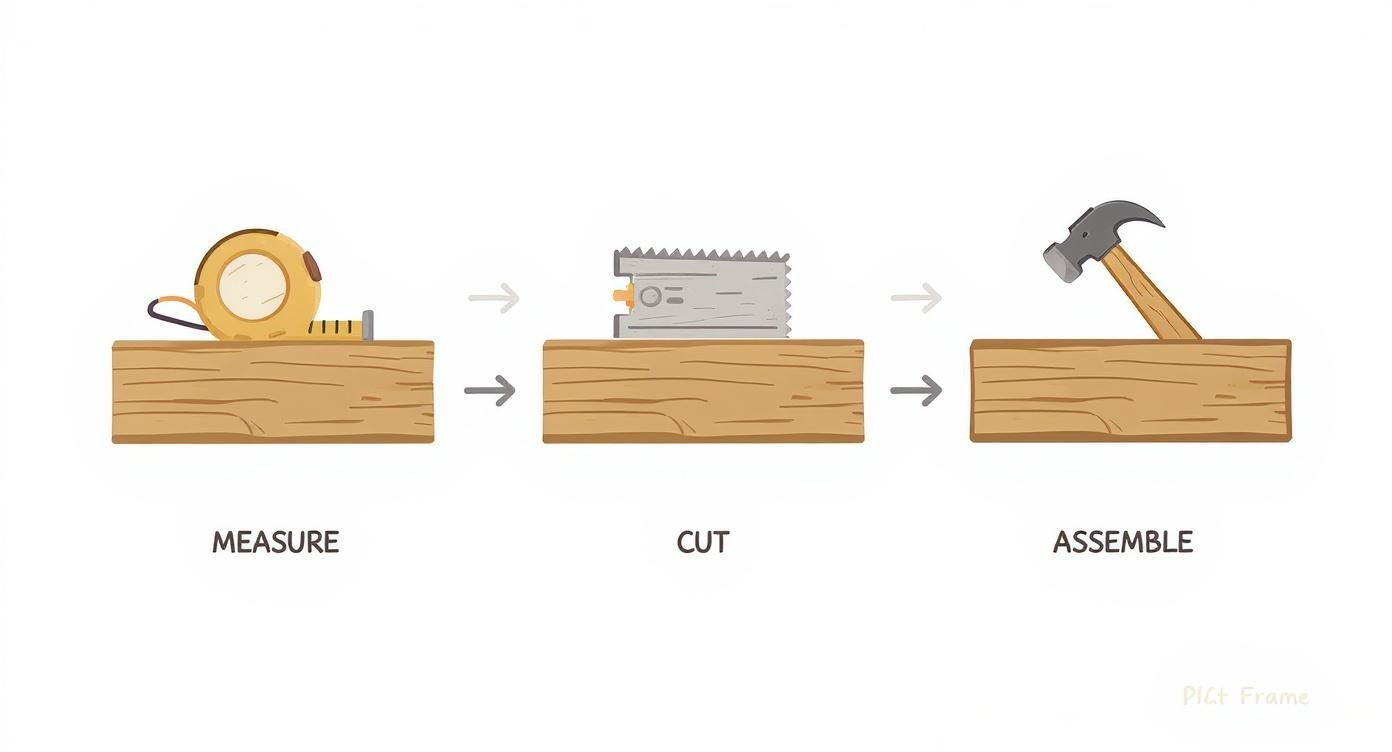
It’s a simple flow, but it really drives home how getting the early stages right is the key to a flawless finish later on.
Perfecting the Surface with Sanding and Staining
A truly beautiful finish starts with a perfectly smooth surface. I know it’s tempting to rush through the sanding, but trust me, it’s the single most important step for getting an even, blotch-free stain.
Kick things off with a medium-grit sandpaper (around 120-grit) to knock down any rough spots left over from assembly. Once that's done, switch to a finer grit (like 220-grit) to get that silky-smooth surface that’s ready to drink up the stain. Always, and I mean always, sand in the direction of the wood grain. Go against it, and you’ll be left with scratches that the stain will highlight.
When you’re ready for the stain, a clean cloth or a foam brush will give you a smooth, even coat. Let it sit for a few minutes, then wipe off any excess to keep it from getting sticky or uneven.
The finish is what people see and touch first. It’s the difference between a project that looks “homemade” and one that looks “handcrafted.” Take your time here; the results are well worth the extra effort.
Sealing the Deal with a Durable Top Coat
Let's be real—your bar is going to see some action. Spills, condensation, and clinking glasses are all part of the fun, so a protective top coat is non-negotiable. Think polyurethane or a tough-as-nails bar-top epoxy.
The trick is to apply several thin coats. Between each coat, give it a very light sanding with super fine-grit sandpaper (320-grit or higher). This little bit of extra work builds up a durable, water-resistant shield that will keep your bar looking fantastic for years. If you're looking for some high-end inspiration, check out projects like this Rooftop Bar featuring Natural Stone Veneer to get ideas flowing for your own design.
Infusing Personality with Lighting and Accessories
Alright, now for the fun part: adding character. The right details can take your bar from just a piece of furniture to the true centerpiece of your entertaining space.
- Ambient Lighting: Under-counter LED strip lighting is a game-changer. It’s easy to install, affordable, and instantly creates a sophisticated, lounge-like vibe.
- Comfortable Seating: Bar stools aren't just for sitting; they're a major style statement. Find a set that complements your bar's design—whether that's industrial metal, rustic wood, or modern upholstered.
- Essential Hardware: A metal foot rail looks incredibly professional and makes things much more comfortable for your guests. Adding stylish bottle openers and towel racks to the side brings both form and function.
Finally, it's time to stock your bar with accessories that reflect the care you put into building it. This is your chance to display that beautiful glassware, a premium cocktail shaker, or a sophisticated decanter. Our assortment of barware is perfect for this, making exceptional gifts for housewarmings, client appreciation, or any special occasion. For whiskey lovers, a set of premium chilling stones is the perfect finishing touch. If you need a little guidance, take a look at our guide on the art of choosing the perfect chill rocks for your home bar.
Got Questions About Your Bar Build?
When you’re tackling your first DIY bar project with free plans, it's natural for a few questions to pop up. Whether you're thinking about changing the design or you're stuck on what materials to buy, getting the right answers is key to a build you'll be proud of. Let's dig into some of the most common things builders ask.
The big one is always, "Can I actually change these free plans?" The answer is a huge yes. Think of free plans as a great starting point, not a strict set of rules. Feel free to tweak the dimensions to perfectly fit your space, throw in some extra shelving for your glassware collection or gift sets, or swap out the countertop material for something more you. Just keep in mind how those changes might affect the bar's stability and, of course, your shopping list.
Picking Your Materials and Going Mobile
Another question I hear a lot is about choosing the best wood. For the frame—the part no one will see—you can't go wrong with standard construction-grade pine or fir, like the 2x4s you see at any hardware store. It's cheap and plenty strong. But for the parts everyone will see, like the bar top or the front panels, you'll want to step it up. Hardwoods like oak, maple, or walnut are incredibly durable and just look fantastic. Good quality plywood is also a solid, stable choice, especially for larger panels and shelves.
Here’s a little insider tip, especially if you're building a bar for corporate events: design a specific nook or shelf right into the build. It creates this perfectly lit spot to showcase high-end gifts, maybe a personalized decanter set or our own elegant whiskey chilling stones. Suddenly, the bar isn't just for drinks; it's a sophisticated display piece and a great way to feature client gifts.
What if you need the bar to be portable for parties or events? You can absolutely do that. When you're putting the frame together, plan on building it in two or three smaller sections. That way, you can just bolt them together on-site. The easiest trick, though, is to install heavy-duty locking casters on the base. It’ll let you roll the bar around a venue or tuck it away for storage without breaking your back.
A bar you’ve built with your own hands deserves accessories that are just as impressive. At ROCKS Whiskey Chilling Stones, we’ve put together a collection of premium barware that's perfect for stocking your new creation or giving as a memorable corporate gift. From custom whiskey glasses to full gift sets, our assortment offers something for every gift seeker or corporate buyer. Explore our collection at https://www.rockscs.com.


